You have finished the edit, the upload window is open, and one export choice can decide whether your 24/7 stream starts cleanly or spends an hour “optimizing.” The safest answer is not the newest codec or the smallest possible file. It is the format that the whole delivery chain can handle predictably.
This guide gives you that format, explains the reason behind every setting, and shows the current export paths in popular editing apps. You can use it for a devotional loop made on a phone, a lo-fi radio playlist, a webinar replay, or any other pre-recorded stream.
The one-line answer
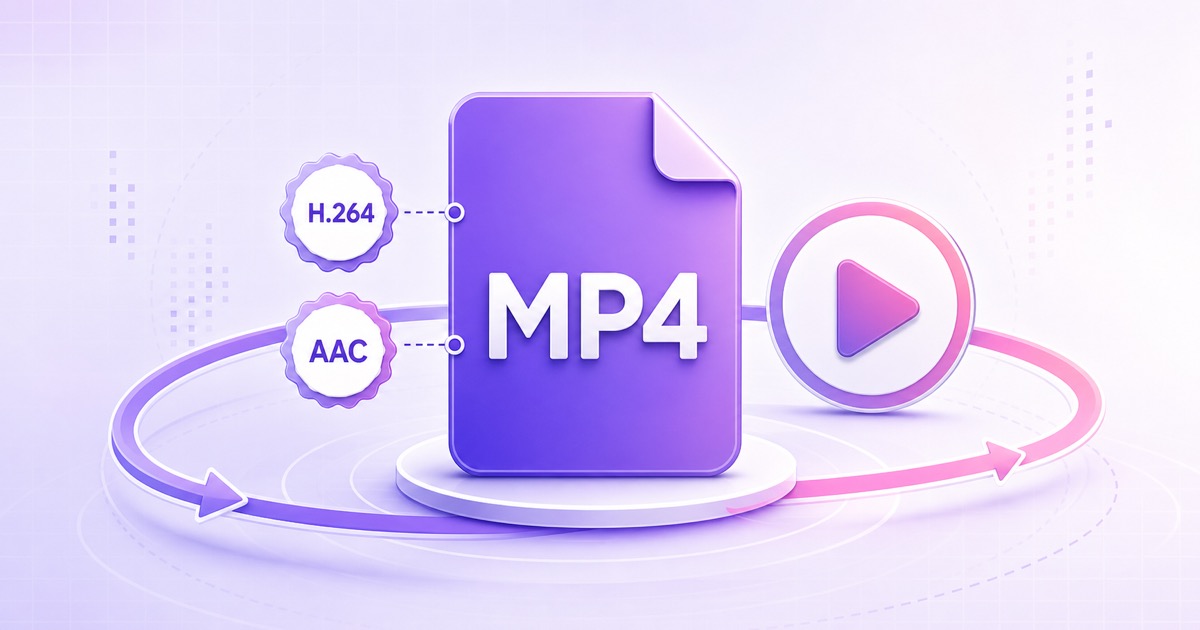
Export an MP4 file with H.264 video, AAC audio, and a constant frame rate. For a normal Full HD loop, use 1920×1080, progressive scan, 30 fps, and 48 kHz stereo audio.
That is the best video format for live streaming when you want broad compatibility across YouTube, Facebook, cloud tools, and standard RTMP delivery. Keep the same resolution, frame rate, video codec, and audio format across every file in a playlist; matching files also make transitions cleaner. Our looping playlist guide explains that uniformity rule in detail.
“MP4” alone is not enough. MP4 is a container: the box holding the video, audio, timestamps, and metadata. H.264 is the video codec, while AAC is the audio codec. A file named .mp4 can still contain HEVC video, so inspect what is inside before relying on the extension.
Why H.264 + AAC specifically
H.264 video and AAC audio are the dependable common denominator for RTMP/RTMPS workflows. Facebook’s current live guidance specifies H.264, while YouTube accepts several modern ingest codecs but still documents H.264 and AAC as standard encoder choices. That makes this pair the safest option when the same master might feed more than one platform.
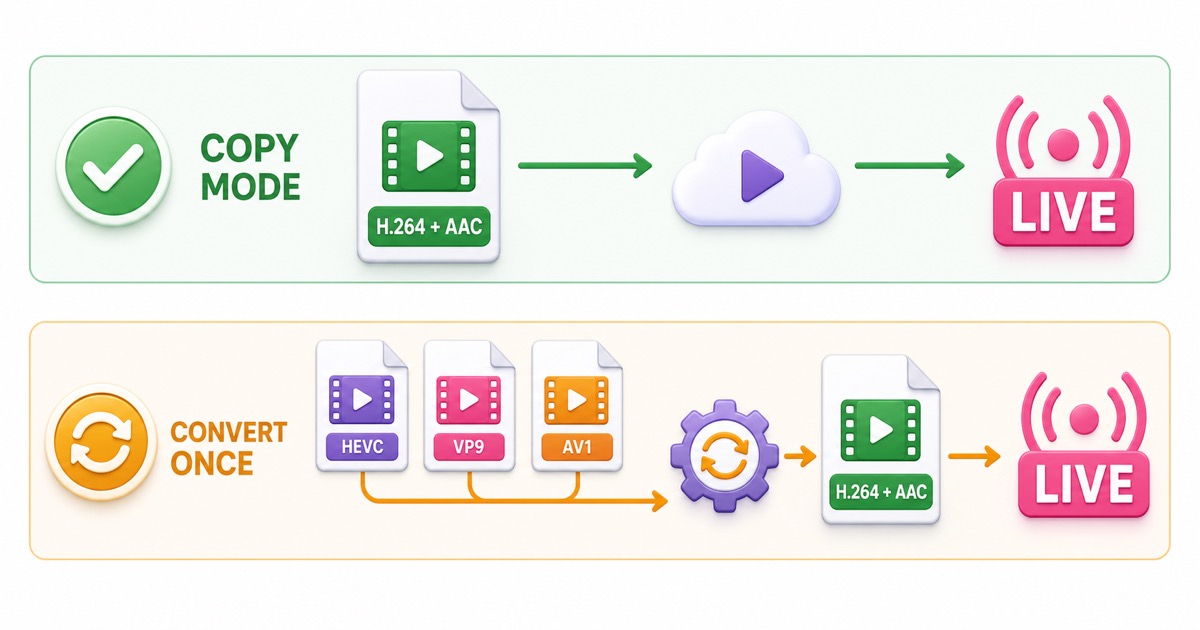
There is also a quality and efficiency reason. If a file already contains compatible H.264 and AAC streams, a delivery service can often remux those compressed packets into the live transport without decoding and encoding the picture again. This is usually called copy mode or passthrough. It preserves the quality of your supplied file at the outbound step and needs far less compute than a live transcode. The destination platform will still create its own viewer renditions, but you avoid adding an unnecessary encode before that stage.
An incompatible codec has to be converted. Conversion decodes each frame and compresses it again, which takes time and compute and can introduce another generation of loss. The practical goal is not “never transcode anything”; it is convert once, correctly, then reuse that compatible master. Read the deeper explanation in why re-encoding can reduce stream quality.
StreamNeo follows that logic: compatible files can stream as-is in copy mode, while incompatible uploads are optimized automatically instead of being rejected. You can therefore upload first, but exporting H.264/AAC yourself gives you more control over quality, bitrate, and readiness.
Can MOV or MKV work?
Often, yes. MOV and MKV are containers too, and either can carry H.264 video plus AAC audio. A compatible MOV or MKV may only need remuxing, not a quality-changing encode. MP4 remains the least surprising handoff format, though: some uploaders, browsers, and streaming workflows apply container-specific rules, and unusual tracks or timestamps can still trigger conversion.
The codecs that trip people
HEVC/H.265 is the most common surprise. It compresses efficiently, and Apple’s “High Efficiency” camera setting records HEVC on supported iPhones. The file may look perfect on the phone yet enter an optimization queue because a cross-platform H.264 copy path cannot pass it through unchanged. YouTube can ingest H.265 in supported live configurations, but that does not make it the universal choice for Facebook or every managed streaming pipeline.
VP9 and AV1 often appear in downloaded web media or modern encoding workflows. They are excellent delivery codecs, but they are not the safest source formats for a traditional H.264/AAC RTMP copy pipeline. Convert them to your streaming master before launch, especially if you need predictable multi-platform output.
Do not guess from the filename. Open the file in the free MediaInfo app and switch to a detailed view. Look for Format: AVC or Codec ID: avc1 under Video; both normally indicate H.264. Under Audio, look for AAC. “HEVC,” “hvc1,” “hev1,” “VP9,” or “AV1” means the video needs conversion for the portable master recommended here.
The silent killer: variable frame rate
Phones and screen recorders commonly use variable frame rate, or VFR, to save space and adapt to changing load. VFR is a valid format and good players respect its timestamps. The risk appears when a long-running loop, remuxer, or conversion step assumes evenly spaced frames or receives messy timestamps. Audio follows its own clock, so timing errors can accumulate into visible lip-sync drift or appear at loop boundaries.
That means VFR does not guarantee a broken stream, but it adds a variable you do not need in an always-on source. Export a constant frame rate (CFR) master at the timeline’s intended rate—usually 25 or 30 fps for talk, devotional, ambience, and study content. Choose 50 or 60 fps only when the motion genuinely benefits and you can afford the higher bitrate.
Keep the chosen rate consistent across a playlist. Do not turn 24 fps footage into 60 fps merely because 60 sounds better; duplicated or interpolated frames do not restore detail. If a long stream is already drifting, use the diagnosis in our audio-sync troubleshooting guide.
Export cheat-sheets
App interfaces change, and mobile controls vary by device and region. The paths below match the current official documentation; after any export, MediaInfo remains the final authority on the file you actually produced.
CapCut on mobile
- Finish the project, then tap the resolution label beside Export in the top-right corner.
- Choose 1080P and set 30 fps, or match the fixed frame rate of your source project.
- Export, then inspect the result in MediaInfo for AVC/H.264, AAC, and Frame rate mode: Constant.
CapCut’s mobile export panel does not expose the same codec and frame-rate-mode controls on every device, app version, or region. Do not claim a hidden toggle exists if you cannot see it. CapCut’s own help centre confirms that available resolution and frame-rate choices vary by device. If the result is HEVC or VFR, move the project to CapCut Desktop or convert the exported file once with a desktop encoder.
Adobe Premiere
- Select the sequence, then choose File → Export → Media.
- Set Format: H.264. Adobe documents that choice as the H.264 route to an MP4 file. Start with Match Source – Adaptive High Bitrate.
- Under Video, confirm Frame Size 1920×1080, your fixed Frame Rate, Progressive field order, and square pixels.
- Under Audio, use AAC, Stereo, 48 kHz, and 128–192 kbps.
- Set the video target bitrate for the destination using the next section, then select Export.
Matching the sequence and export frame rate produces a CFR delivery file. If your source is VFR, let Premiere conform it on a CFR timeline and check the rendered result rather than passing the phone file through untouched. Adobe’s current export documentation uses these menu names.
DaVinci Resolve
- Open the Deliver page and choose Custom Export.
- Under Video, select Format: MP4 and Codec: H.264.
- Set Resolution to 1920×1080 HD and Frame rate to the project’s fixed rate, normally 25 or 30 fps.
- Open the Audio section, enable Export Audio, and choose AAC, Stereo, 48 kHz, and 128–192 kbps where those controls are available.
- Add the job to the Render Queue, render it, and verify it with MediaInfo.
Resolve’s available encoders can differ by operating system and Free versus Studio edition. Set your timeline frame rate correctly before editing, then keep the Deliver-page frame rate matched; do not force a different rate at the last step.
iPhone camera
- Open Settings → Camera → Formats.
- Select Most Compatible. Apple states that new videos then use H.264 instead of the HEVC used by High Efficiency.
- Go to Settings → Camera → Record Video and choose 1080p HD at 30 fps when that suits your channel.
This changes future recordings, not clips already captured. Apple documents the exact Most Compatible path in its HEIF and HEVC support guide. An editing app can still produce VFR or choose another codec during export, so check the final master rather than assuming the camera preference survived the edit.
Bitrate and size, briefly
Bitrate controls how many bits the compressed video uses per second. More bitrate can preserve difficult motion, smoke, rain, fine text, or foliage; it cannot restore detail missing from the source. Excess bitrate only creates a larger file and may exceed a destination’s guidance.
Current official guidance is not identical across platforms. YouTube recommends 10 Mbps H.264 for 1080p30 and 12 Mbps for 1080p60. Facebook lists 3–6 Mbps for 1080p30. Use the destination’s current setting rather than copying one number everywhere; platform specifications can change.
| Video bitrate | Approx. size per hour | Practical use |
|---|---|---|
| 4 Mbps | 1.86 GB | Low-motion 1080p30 within Facebook’s range |
| 6 Mbps | 2.76 GB | Facebook’s current upper recommendation; useful for moderate motion |
| 10 Mbps | 4.56 GB | YouTube’s current H.264 recommendation for 1080p30 |
The estimates include 128 kbps audio and use decimal gigabytes: (video Mbps + audio Mbps) × 0.45 = GB per hour, before small container overhead. A 60-minute 10 Mbps loop is therefore about 4.56 GB, while the same loop at 6 Mbps is about 2.76 GB. For resolution-specific choices, see the 720p versus 1080p bitrate guide.
Check before you upload
Make this 60-second MediaInfo ritual part of every export. Open the final file—not the camera original—and confirm:
- Container: MPEG-4, normally shown with an
.mp4extension. - Video: AVC/H.264, 1920×1080, progressive scan.
- Frame rate mode: Constant, with the expected 25, 30, 50, or 60 fps value.
- Audio: AAC, Stereo, preferably 48 kHz, with a sensible 128–192 kbps bitrate.
- Duration: video and audio durations match closely.
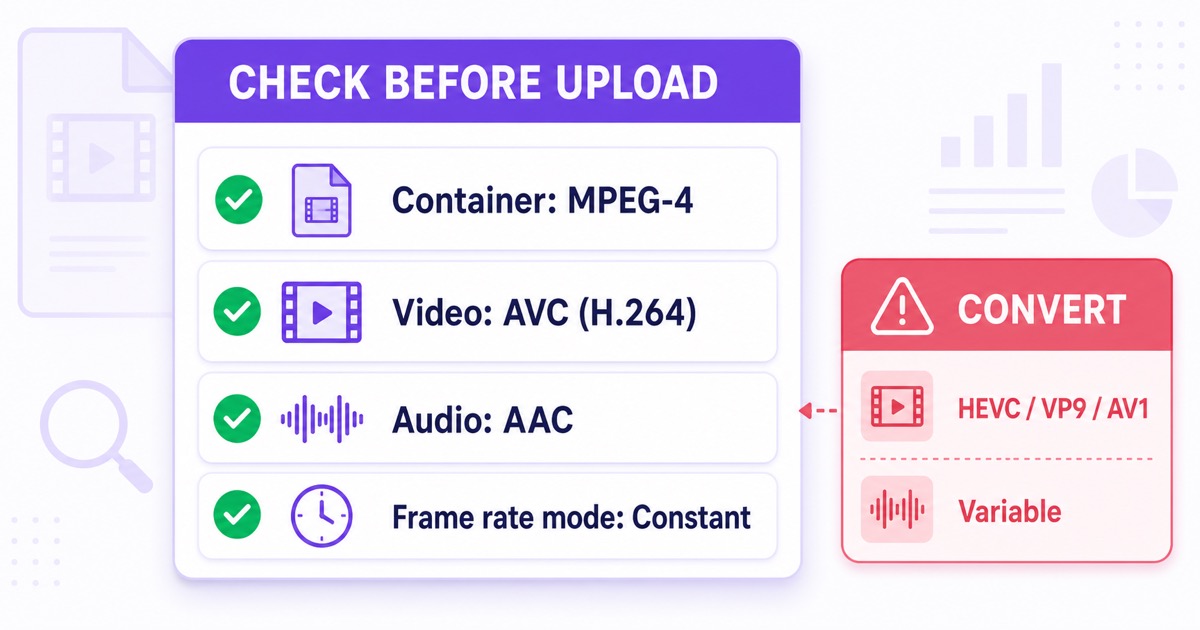
If all five checks are green, upload the master and run an unlisted test before committing to an always-on broadcast. Watch a loop boundary, scrub through motion-heavy sections, and listen for sync. That short check is cheaper than discovering a timestamp or codec problem after the stream has been live overnight.
Your reusable export recipe: MP4 + H.264 + AAC + CFR, 1080p at a native frame rate, with bitrate chosen for the destination.
Start free — 24-hour trial, no card. Upload the file you have; StreamNeo can use copy mode for compatible media and optimize incompatible uploads automatically.
FAQ
Is MKV or MOV okay for streaming?
It can be. MKV and MOV are containers, not video codecs. If the tracks inside are H.264 video and AAC audio with usable timestamps, a streaming tool can often remux them without re-encoding. MP4 is still the most broadly predictable upload format, so use it when you control the export.
What bitrate should I use for 1080p?
Match the platform and frame rate. Current YouTube guidance recommends 10 Mbps for H.264 1080p30 and 12 Mbps for 1080p60; current Facebook guidance lists 3–6 Mbps for 1080p30. Check the linked official pages before a major production because platform ranges can change.
Why does my iPhone video get re-encoded?
Your iPhone may have recorded HEVC/H.265 under the High Efficiency setting, while the portable copy-mode workflow needs H.264. For future clips, use Settings → Camera → Formats → Most Compatible. Existing HEVC clips still need a one-time H.264 conversion, and you should confirm the converted file is CFR in MediaInfo.