A prepared .srt file feels like it should be easy to attach to a pre-recorded live stream. Then you open the live setup and find no obvious upload box. That is because an uploaded video and an incoming live feed handle captions differently.
For a coaching lesson, recorded Sunday service, webinar, or spoken devotional programme, this is an accessibility decision rather than a decorative edit. You need captions that arrive every time, stay readable on a phone, and do not turn a name or Hindi phrase into nonsense.
This guide explains the three real routes, shows how to add captions to live stream video with FFmpeg, and makes the trade-offs clear before you render a long loop.
Three caption routes, and only two are available to a loop
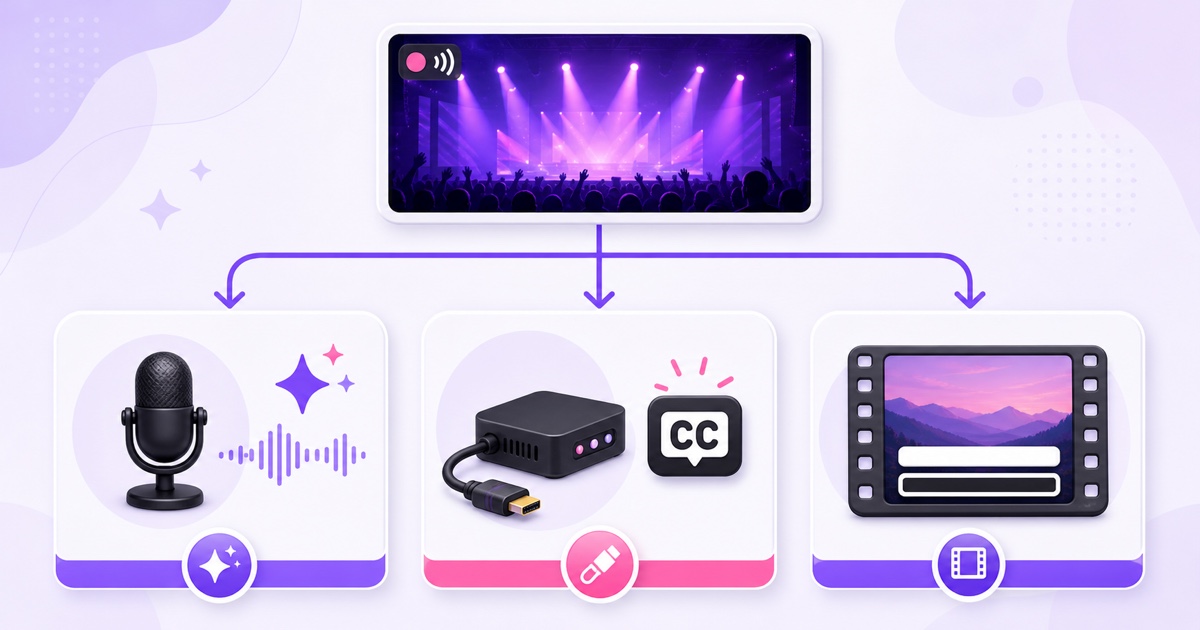
Live captions can come from the platform, from a separate professional caption feed, or from pixels already inside the video. A basic cloud loop supplies video and audio; it does not automatically turn a sidecar .srt file into a timed live-caption feed.
| Route | How it reaches viewers | Viewer can switch it off? | Practical for a simple loop? |
|---|---|---|---|
| Platform auto-captions | YouTube recognises speech while the stream is live | Yes | Sometimes; language, latency, channel, and stream conditions apply |
| Ingested closed captions | An encoder embeds captions, or supported captioning software posts a separate feed | Yes | Usually no unless your encoder or captioner supports the workflow |
| Burned-in open captions | The words are rendered into every video frame before upload | No | Yes; the finished video loops like any other MP4 |
The practical fork is simple. Try YouTube automatic captions when the stream is eligible, the speech is English, and occasional errors are acceptable. Burn captions into the source when every viewer must see approved wording. Use professional ingestion only when you already have a compatible encoder or caption provider.
What YouTube's live auto-captions really do
YouTube can generate captions while an eligible live stream is running, but its live support is narrower than its support for uploaded videos. YouTube's current automatic-captioning help page says live automatic captions are English-only, work on normal-latency streams, and must be enabled for each stream rather than for the whole channel. The feature is still described as a rollout, so do not build an accessibility promise around the assumption that every channel will see it.
The setup path is YouTube → Create → Go live → Stream → Stream settings → Closed captions. Choose Automatic captions, then select English as the video language. If Automatic captions is missing, confirm that the stream uses normal latency, professional captions are not configured, the channel has access, and YouTube can recognise the audio.
These captions are generated after speech reaches YouTube, so they do not appear at the exact instant a word is spoken. Viewers also control the CC setting in their player. Someone who has captions off may never see them, which makes this route unsuitable for an essential warning, translated sermon, examination instruction, or name that must be displayed correctly.
Accuracy changes with the source. Clean audio and one speaker help. Overlapping voices, room echo, background music, accents, and mixed languages make recognition harder. Proper nouns, scripture references, medical words, and course-specific vocabulary deserve particular suspicion. YouTube itself advises creators to review machine captions because mispronunciations, accents, dialects, and noise can produce errors.
Also separate live captions from archive captions. YouTube says the automatic captions shown during a live stream do not remain with the finished video. After the stream ends, its video-on-demand system generates a new track, and that version may differ from what viewers saw live.
Ingested closed captions, honestly scoped
Closed-caption ingestion is a real YouTube capability, not another name for uploading an .srt. According to YouTube's current live caption requirements, captions can arrive in two ways: embedded in the video signal as EIA-608/CEA-708 data, or sent over HTTP POST by supported professional captioning software.
For embedded captions, create the live stream, open Settings → Setup → Closed captions, and choose Embedded 608/708. Your encoder then has to place that caption data into the signal. YouTube currently accepts one caption track even though the 608/708 standard can carry more.
For a professional captioner, the event setup can expose a signed Captions Ingestion URL. That URL goes into compatible captioning software, which sends timed captions separately from the video feed. YouTube's help page also calls for a 30- or 60-second broadcast delay in that event workflow, giving the caption process time to keep pace.
This is valuable for a genuinely live conference, service, or broadcast with a stenographer. It is usually excessive for a prepared loop. Most simple cloud loop tools accept a video file and destination stream key; they do not expose a 608/708 pipeline or run caption software against a signed endpoint. Unless your chosen encoder explicitly documents live closed-caption output, assume that an .srt beside the MP4 will be ignored.
Burned-in captions: the route that always works
Burned-in captions, also called open captions, become part of the picture. The streaming platform does not need to recognise, carry, or display a separate text track. The cost is one video re-encode before upload, and viewers cannot hide the words afterward.
Start with a UTF-8 .srt file. Each cue contains an index, a start and end time, and the text to display:
1
00:00:04,120 --> 00:00:07,480
Welcome to today's lesson.
Put subs.srt beside in.mp4, then run this FFmpeg command from that folder:
ffmpeg -i in.mp4 -vf "subtitles=subs.srt:force_style='FontName=Noto Sans,FontSize=26,Outline=2,MarginV=60'" -c:a copy out.mp4
The subtitles filter forces the video through one re-encode; -c:a copy preserves a compatible source audio track without another audio conversion. If FFmpeg reports that the subtitles filter is unavailable, install a build that includes libass. If the audio cannot be copied into MP4, encode it as AAC instead of repeatedly changing unrelated settings.
- Watch the first cue, a middle cue, and the final cue to confirm timing.
- Play the last ten seconds into the first ten seconds. A caption must not hang across the loop boundary.
- Inspect the output with sound on and off, full-screen and on a phone.
- Confirm that the export still matches your playlist's resolution, frame rate, pixel format, and audio sample rate.
Use the settings in the 24/7 streaming video format guide, then reduce file size with the compression walkthrough only after the captioned master looks right. Multiple re-encodes compound quality loss.
With StreamNeo, you burn once, upload the finished file, and every loop cycle carries the captions without per-stream caption configuration. See current StreamNeo pricing before choosing a plan.
Getting an accurate transcript without typing it
One practical starting point is to upload the source video to YouTube as private and wait for its uploaded-video automatic captions. In YouTube Studio → Subtitles, open the video, duplicate and edit the automatic track, and use the track's options to download the corrected caption file. Uploaded-video language support is broader than live auto-caption support, but the result still needs review.
A local speech-to-text tool is another route when the recording is sensitive or the upload is too slow. Export an .srt or timed text file, then compare it against the actual recording. The tool saves keystrokes; it does not transfer editorial responsibility.
Make a correction sheet before the pass. List every speaker, place, scripture reference, product, acronym, and technical term exactly as it should appear. For a coaching institute, include subject vocabulary and formula names. For a church re-broadcast, include speakers, books, chapter references, songs, and congregation names; the full recorded Sunday service guide covers the wider broadcast workflow.
Then read the captions once without audio. This catches duplicated lines, missing context, broken sentence boundaries, and cues that disappear too quickly. Finally, listen while watching at normal speed. A transcript can be word-perfect and still fail as captions if the timing is uncomfortable.
Indian languages, specifically
Hindi subtitles live stream correctly only when the selected font contains the required Devanagari glyphs and the rendering stack supports shaping. The same issue applies to Tamil, Bengali, Telugu, Gujarati, Gurmukhi, Malayalam, and other scripts. A font name that works for English is not evidence that it covers another writing system.
Choose a script-specific family such as Noto Sans Devanagari, Noto Sans Tamil, or Noto Sans Bengali, and make sure that font is installed on the machine doing the burn. Otherwise FFmpeg may fall back to a mismatched font, show empty squares, or break conjunct characters. Save the .srt as UTF-8; legacy encodings can corrupt otherwise correct text.
Render a 30-second sample containing the hardest names, vowel marks, punctuation, numerals, and two-line cues. Look at the pixels rather than trusting a successful FFmpeg exit code. Ask a fluent reader to check spelling, line breaks, and meaning before rendering the full programme.
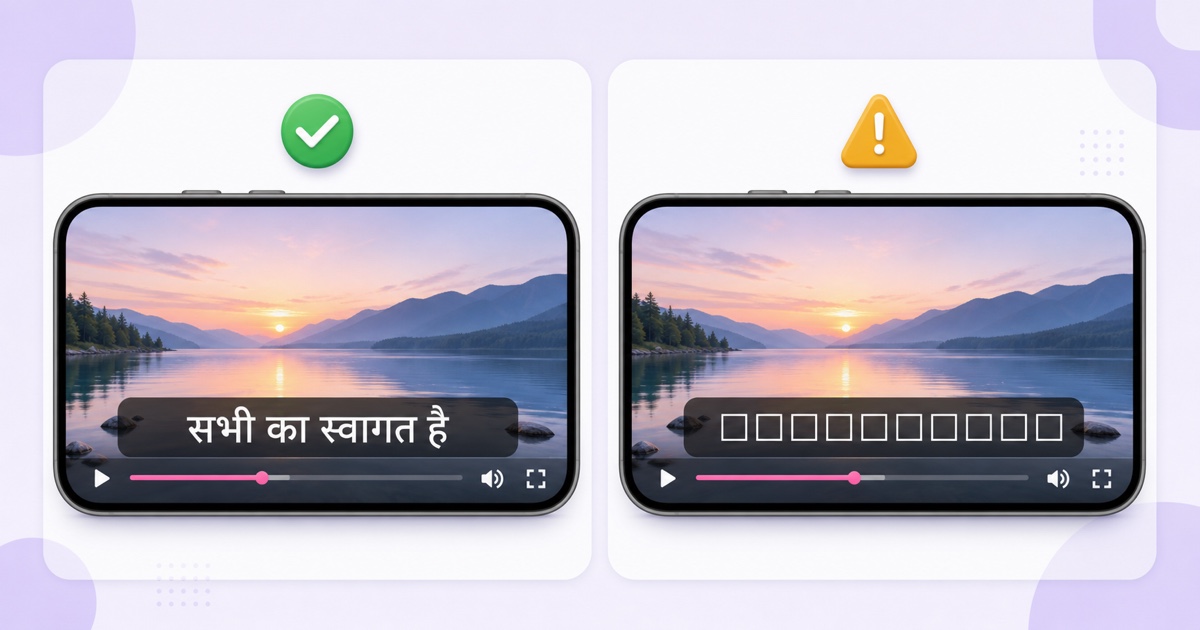
Decide between native script and transliteration from audience needs, not convenience. “Aap sabhi ka swagat hai” may help a viewer who speaks Hindi but cannot read Devanagari; “सभी का स्वागत है” serves a reader comfortable with the script. If both matter, use separate versions or carefully designed two-line captions rather than squeezing long duplicate text into one line.
Styling that survives a phone
Start around 26–34 px for a 1080p export, then test with the actual font and frame. A heavy outline or translucent dark box keeps white letters readable over both a white shirt and a bright slide. Limit cues to two lines and break them at natural phrase boundaries.
Raise the bottom margin enough to clear player controls and lower-third graphics. Keep essential words inside the same conservative safe area you would use for a logo or LIVE badge; the guide to overlays on a 24/7 loop shows why edges and player chrome are risky.
- Read from arm's length: play the sample on the smallest phone you expect viewers to use.
- Check contrast continuously: test the brightest and darkest scenes, not one convenient frame.
- Respect speech rhythm: avoid rapid one-word flashes and dense three-line paragraphs.
- Keep captions consistent: use one position and style unless identifying speakers genuinely requires a change.
Accessibility and reach, both
Burned-in captions guarantee visual presence, but they are not a complete accessibility layer. Viewers cannot enlarge, restyle, translate, or switch them off. Screen readers and search systems cannot reliably treat pixels as a proper caption track.
Paste the corrected transcript into the stream description when it fits, with speaker names and useful section markers. For a long programme, place a concise transcript excerpt in the description and link to a complete accessible transcript page. This gives people a way to skim, lets assistive technology reach the words, and provides text that the burned video itself cannot expose.
If YouTube auto-captions are also available, leaving them enabled can give viewers a switchable track while the open captions protect the approved wording. Test the combination: two caption layers in different positions can become distracting. The durable principle is to provide the message in pixels and in accessible text, then verify both as a viewer would.
Before replacing your production file, Start free — 24-hour trial, no card, upload the captioned sample, and watch one complete loop as a viewer.
More from the journal: 24/7 YouTube Streaming: The Complete 2026 Guide · The 24/7 Stream Pre-Flight: 12 Checks Before You Leave It Running · Run a 24/7 YouTube Stream on a Chromebook, Tablet or Low-End Laptop · Testing a 24/7 Setup Before You Commit: A 48-Hour Burn-In
FAQ
Does YouTube caption live streams automatically?
For eligible streams, yes, but current live automatic captions are English-only and require normal latency. They must be enabled for each stream, arrive after a delay, can contain recognition errors, and remain under the viewer's CC control. Verify that your channel exposes the option before relying on it.
Can I attach an .srt file to a live stream?
Not as a simple sidecar file in a standard loop setup. YouTube can generate live captions, accept a professional caption feed, or receive embedded 608/708 captions from a compatible encoder. For an ordinary pre-recorded loop, the reliable use of an .srt is to burn it into the video before upload.
Will burned-in captions hurt anything?
They require one video re-encode, permanently occupy part of the picture, and cannot be turned off, resized, or read as text by search and assistive technology. Keep an uncaptioned master, use a high-quality single render, and add the corrected transcript to the description or an accessible transcript page.